





Standing Desk Cable Management: A Safe, Movement-Ready Setup Guide
Learn how to organize cables on a standing desk so power, monitor and data connections move safely from sitting to standing height.

In this article
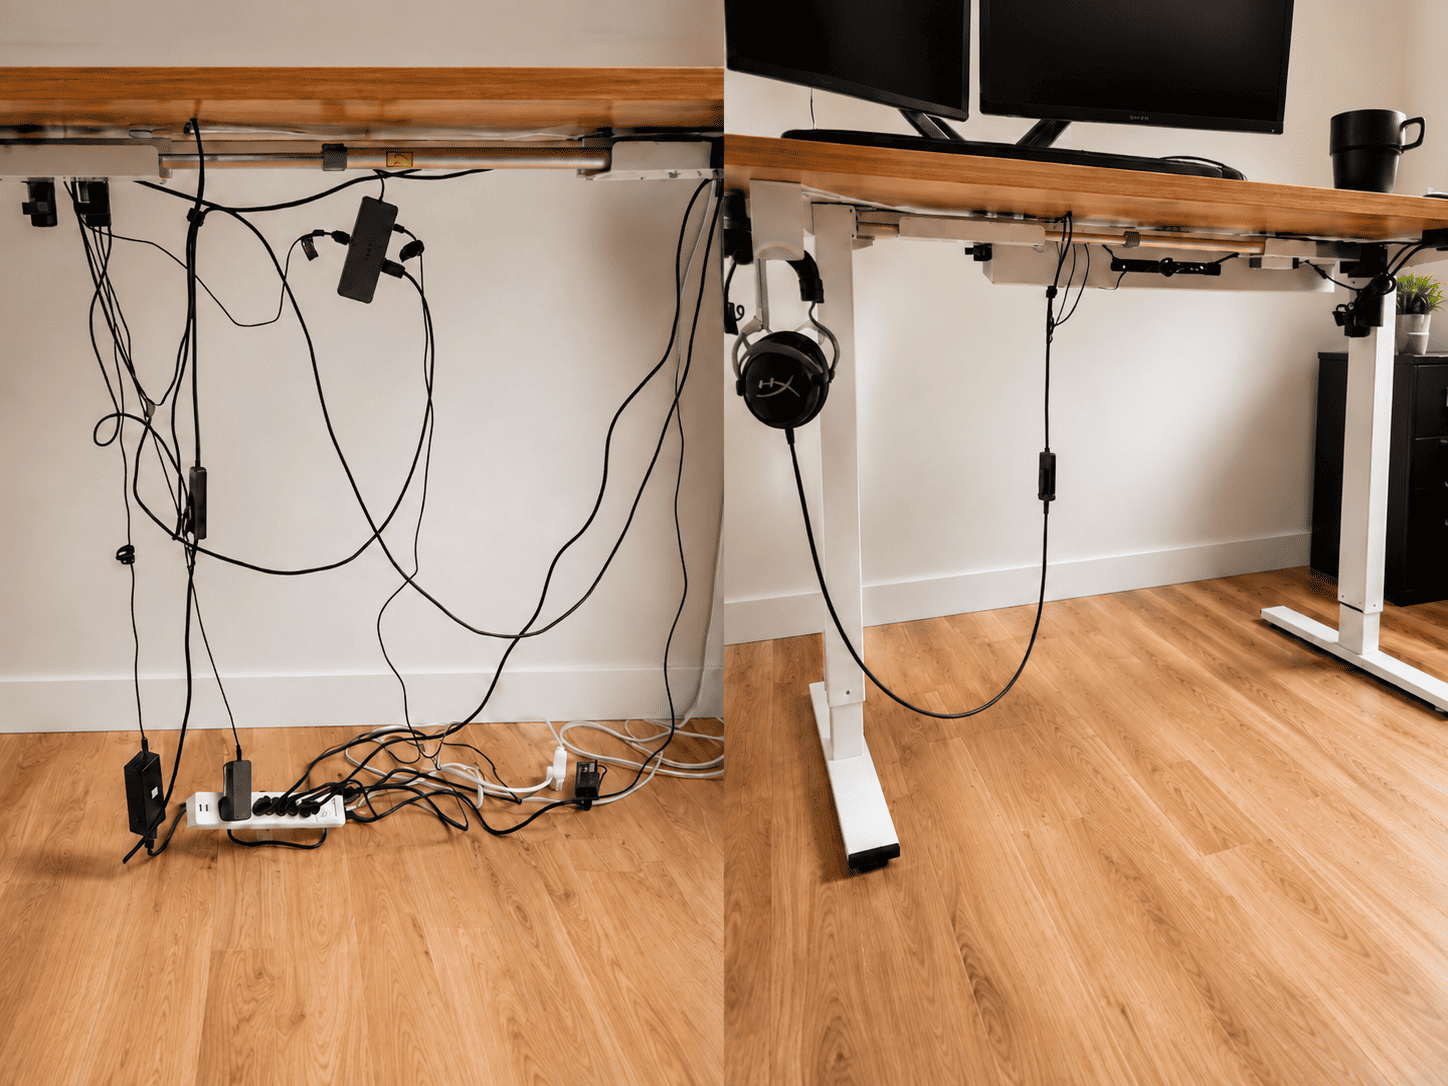
Cable management on a fixed desk is mostly about appearance. On a standing desk, it is also about movement. Every time the work surface rises or lowers, power cords, display cables, chargers and data connections change position. A setup that looks tidy at sitting height can pull on a monitor port, catch on the frame or run out of slack at standing height.
The goal is not to hide every centimetre of wire. It is to create a controlled system that moves freely through the desk's full height range, keeps connections accessible and makes future changes easy. This guide explains how to plan that system before you start fastening cables under the desktop.
Why standing desk cable management is different
A conventional desk has one fixed relationship to the wall outlet and floor. A height-adjustable desk has two zones: equipment that travels with the desktop and infrastructure that stays fixed in the room.
Your monitor, laptop dock, speakers and chargers usually move with the desk. The wall outlet, network jack and floor remain stationary. The cables between those two zones need enough controlled movement to follow the desk without tension or loose loops that can snag.
This distinction helps solve most cable problems. Keep as many connections as possible within the moving zone, then minimize the number of cords that must travel from the desk to a fixed point.
Step 1: Inventory every device and connection
Before mounting a tray or applying clips, list everything that needs power or data. A typical workstation may include:
- one or more monitors;
- a laptop or desktop computer;
- a docking station;
- speakers, a webcam and task lighting;
- phone, tablet and accessory chargers;
- the standing desk control box and motors;
- Ethernet, USB and display cables;
- a printer or other equipment that remains off the desk.
Label both ends of cables that look alike. Remove abandoned adapters and cords before organizing the rest. This reduces the size of the bundle and makes troubleshooting much easier later.
Next, note which items must remain easy to unplug. A charging cable used every day should not be buried beneath a permanent bundle. A monitor power cable that rarely moves can be secured more closely.
Step 2: Plan the moving and fixed zones
The moving zone
The moving zone includes the desktop, the underside of the desktop and anything securely attached to them. Device cables, adapters and a desk-mounted power source can stay in this zone. When the desk changes height, these components move together and their relative distances remain almost unchanged.
The fixed zone
The fixed zone includes the wall outlet, floor, baseboard, network jack and any computer or printer that does not move with the desk. Cables that cross from the moving zone to the fixed zone require special attention.
A practical plan is to centralize device connections under the desktop, then create one intentional cable drop toward the wall. This is simpler to test than several loose cords descending from different points.
Step 3: Centralize power under the desktop
Mounting an appropriate power bar under the work surface can reduce the number of cords that must reach the wall. Monitors, chargers and other low-demand office devices can plug in near the equipment they serve, while the power bar's main cord becomes the primary moving connection.
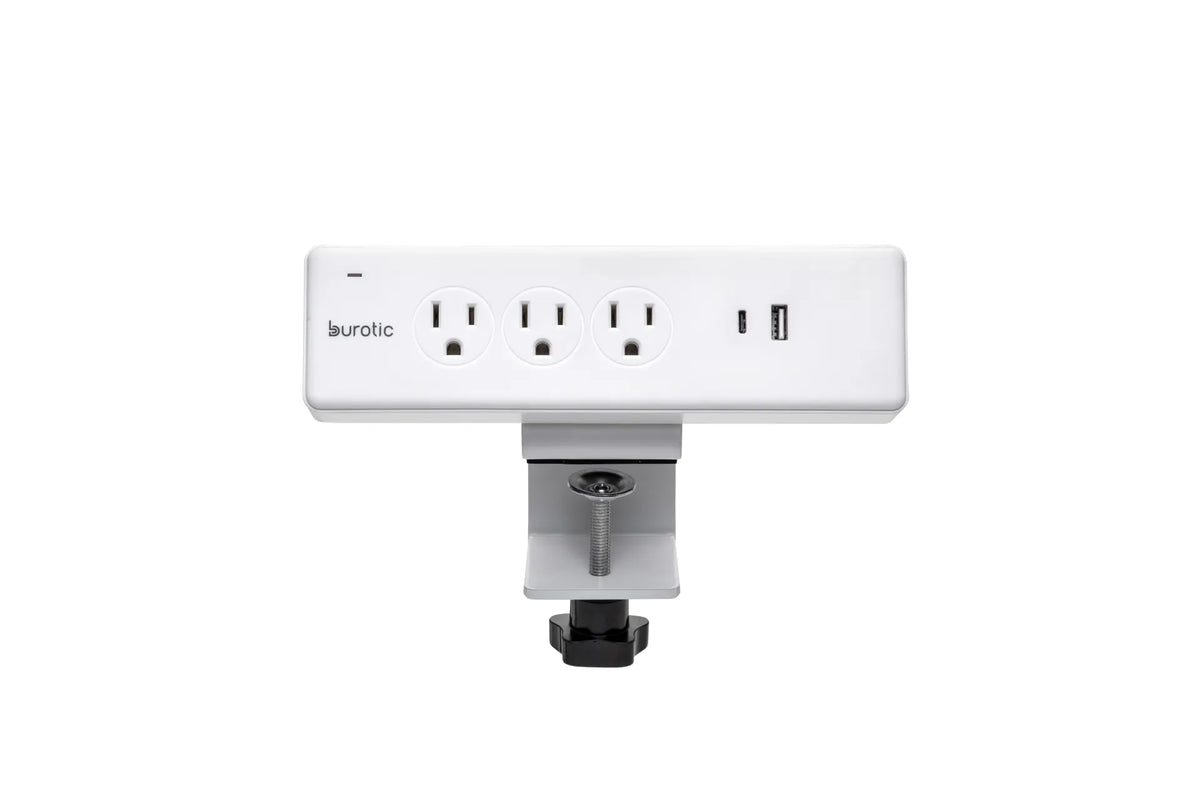
Burotic offers an under-desk or on-desk power bar with three electrical outlets, one USB port and one USB-C port. Confirm that the number of outlets, cable length and electrical ratings suit your actual equipment before installation.
Do not assume that every power bar is appropriate for every device. Follow the manufacturer's instructions, use approved equipment and avoid exceeding rated electrical capacity. The Canadian Centre for Occupational Health and Safety recommends inspecting cords, plugs, power bars and charging equipment for wear or damage. Damaged equipment should be removed from service rather than hidden inside a cable tray.
Secure a power bar using the mounting method designed for the product and the desktop material. Do not support it by its cord. Keep its switch and plugs accessible so the workstation can be disconnected when necessary.
Step 4: Give adapters and excess cable a stable home
Power bricks are often the heaviest and most awkward parts of a cable setup. If they hang freely, their weight can pull on connectors. If they sit on the floor, they create several separate runs between the desk and the wall.
An under-desk tray gives adapters, excess cable and connection points a defined location. The Burotic Cable Management Solution is designed for quick access when cables need to be added or removed. Accessibility matters because a cable system should be maintainable, not permanently sealed.
Distribute weight rather than stacking every adapter in one spot. Keep ventilation openings clear and follow equipment instructions concerning heat and clearance. Use reusable hook-and-loop ties for bundles that may change. Tight plastic ties can compress cables and make upgrades needlessly difficult.
Step 5: Route monitor and accessory cables
Run monitor power and display cables toward the nearest organized route under the desktop. Leave enough local slack for screen adjustment, especially when using an articulated monitor arm. Test tilt, rotation and side-to-side movement before securing the final bundle.
Do not force a display cable into a sharp bend at the monitor connector. A cable can have enough total length and still create harmful tension if the first few centimetres are held too tightly.
Keep the keyboard and mouse close enough to avoid reaching. The CCOHS recommends placing them near the front of the work surface, about 5 cm or 2 inches from the edge as a general starting point, while keeping the shoulders relaxed and elbows close to the body. Cable routing should support this placement rather than pull input devices toward the back of the desk.
Step 6: Create one controlled path to the wall
Once most connections are contained under the desktop, guide the remaining wall-bound cord or cords down a predictable route. This could follow a desk leg, a flexible cable sleeve or a vertical cable spine. The route must bend and extend freely as the desk moves.
Avoid fastening the moving section rigidly to both the desk and the wall. Also keep it away from lifting columns, crossbars and other moving frame components. Anti-collision technology is useful, but it should not be treated as a cable detector.
Keep cords out of walking paths. The CCOHS warns against using nails or staples to secure extension cords because they can damage insulation. If a cord must cross a fixed floor area, use an appropriate floor cable protector or revise the outlet and desk placement.
Step 7: Set slack at maximum standing height
Slack should be tested, not estimated from the seated position. Raise the desk to its highest intended working height while watching every cable that connects to the wall, floor or stationary equipment.
At maximum height, no cable should become taut, lift an adapter, pull a plug sideways or move a device. At minimum height, the same cable should not form a large loop that can enter the frame or rest under a chair caster.
Create a controlled service loop in a clear area. The correct amount depends on the desk's travel, the outlet location and the route. Generic measurements from another installation may not fit yours. Test the actual workstation through its full range.
Step 8: Test movement before final fastening
Run a slow movement test with one person at the controls and another observing the rear and underside when possible.
- Start at the lowest usable height.
- Check every connector, adapter and bundle.
- Raise the desk a short distance and stop.
- Confirm that cables slide or flex without catching.
- Continue to maximum height.
- Move each monitor arm and frequently adjusted accessory.
- Lower the desk and watch where the extra cable settles.
Listen for rubbing and look for cables approaching sharp edges, moving joints or hot equipment. Correct the route, then repeat the test. Only apply final clips and ties after the entire movement is clean.
Cable management for a desktop computer
A desktop computer creates an important choice. If the tower stays on the floor, several power and data cables may need to span the desk's travel. If it moves with the work surface in a compatible mount, the tower's weight and mounting security must be considered.
Neither arrangement is automatically best. Keep the tower on the floor when the cables are long enough, the route is protected and airflow is adequate. Consider a compatible desk-mounted solution only after confirming the mount, desktop and frame can safely support the computer. Never place a tower where the descending desk could contact it.
Common standing desk cable management mistakes
- Organizing only at sitting height. A neat seated setup may become tight when raised.
- Leaving every adapter on the floor. This creates multiple moving cable runs and more points of tension.
- Using too many permanent ties. Workstations change, so key bundles should remain serviceable.
- Routing through moving frame parts. Cables should stay clear of columns, joints and crossbars.
- Ignoring monitor arm movement. Screen adjustment requires local slack near the arm.
- Hiding damaged cords. Organization does not make worn electrical equipment safe.
- Overloading a power bar. Confirm ratings and follow the manufacturer's instructions.
A final checklist
- Every active device and cable has been identified.
- Most device connections remain within the moving desktop zone.
- Power equipment is suitable, accessible and securely mounted.
- Adapters are supported rather than hanging from connectors.
- Keyboard and mouse placement remains ergonomically practical.
- Monitor cables allow the full range of arm movement.
- The wall-bound cable path avoids pinch points and walking areas.
- No cord is taut at maximum height.
- Extra slack remains controlled at minimum height.
- The desk has completed several full up-and-down tests.
Build the system around movement
The best standing desk cable management setup is not simply the one with the fewest visible wires. It is the one that remains safe, accessible and predictable every time the desk changes height.
Start by centralizing connections under the desktop, route a controlled path to the wall and test both height extremes before final fastening. A thoughtful setup protects your connections, simplifies cleaning and makes it easier to add equipment later.
Sources
- Canadian Centre for Occupational Health and Safety: Electrical Safety
- Canadian Centre for Occupational Health and Safety: Office Safety
- Canadian Centre for Occupational Health and Safety: Keyboard Selection and Use
This article provides general workspace information. Follow the instructions and electrical ratings supplied with your equipment. Consult a qualified electrician when changes to fixed wiring or outlets are required.
Previous article
How to Choose an Ergonomic Chair That Fits Your Body
Next article
How to Plan an L-Shaped Standing Desk Setup That Fits Your Room