

Where Should a Standing Desk Controller Be Installed?

In this article
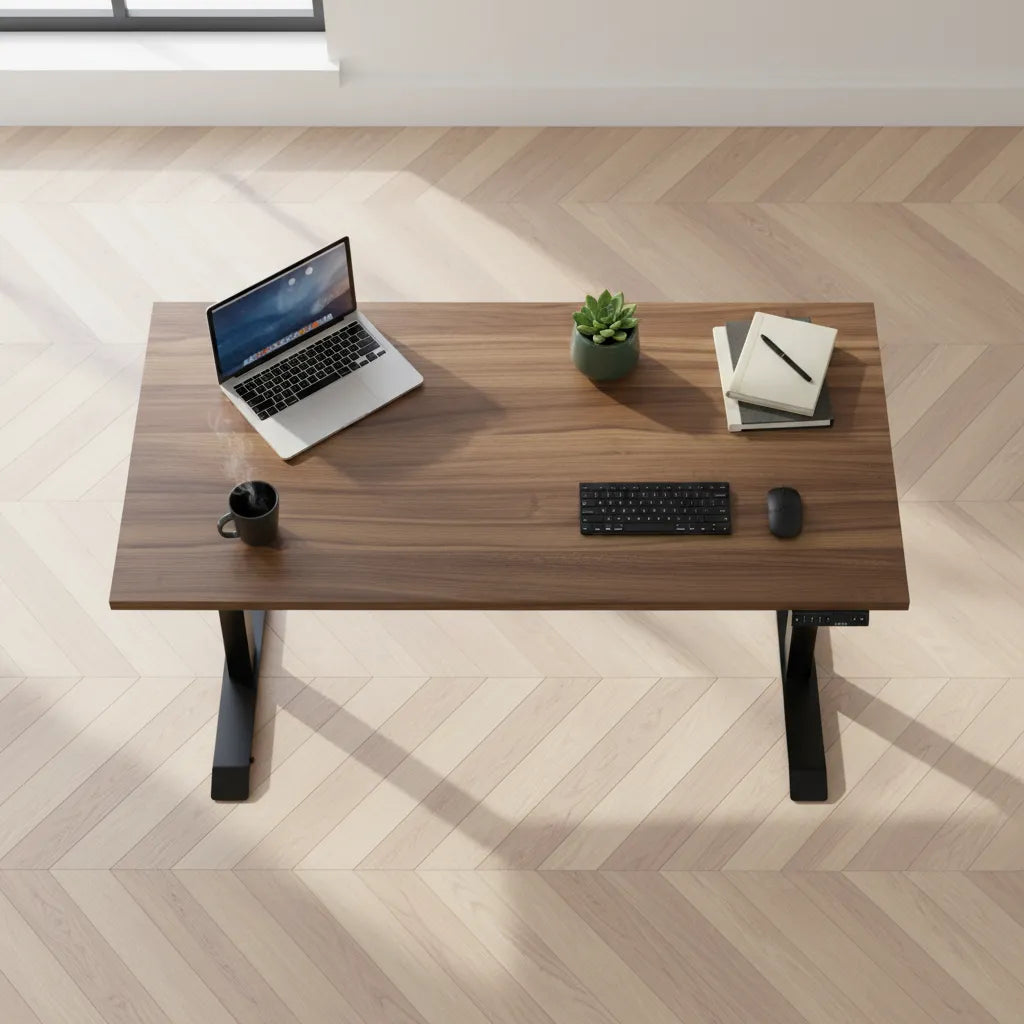
A standing desk controller should be installed under the front edge where you can reach it without leaning, where the display remains visible, and where the chair, armrest, drawer and nearby objects will not strike it. The right or left side is a personal and practical choice. Dominant hand matters, but clearance and cable routing can matter more.
Before drilling, sit and stand at the assembled desk, hold the controller in several positions and test the whole workstation. Use the manufacturer's approved orientation, hardware and cable connection. If the top has pre-drilled controller holes, confirm which options the instructions support before creating new ones.
Quick answer: use the front edge on the clearest side
Start near the front right or front left corner, a comfortable hand's reach from your normal working position. The buttons should be easy to operate while your shoulders remain relaxed. Recess the unit enough to protect it from passing objects, but not so far that the top hides the display or forces your wrist under the desk.
Choose the side only after checking the chair arm, drawers, monitor-arm clamp, power accessories and the controller cable. A convenient hand position is not useful if the chair hits the controller every time you stand up.
Right side or left side?
Use the dominant hand as a starting point
Many people prefer the controller on the same side as their dominant hand because the movement feels immediate. Others prefer the opposite side so the mouse hand can remain in place. Neither choice is inherently more ergonomic. The best side lets you activate the desk deliberately without twisting or reaching across the body.
Let obstacles decide when needed
An under-desk drawer, cable tray, computer mount or structural support may occupy the preferred side. Map every underside component before drilling. Moving the controller a short distance is usually better than weakening another installation or crowding several cables into one point.
Set the front-to-back position
A controller mounted flush with the front edge is highly visible but more exposed to impacts. A deeply recessed controller is protected but may be hard to see and reach. Hold it under the edge and operate every button with the forearm relaxed. Make sure the display can be read from the normal chair position.
Check the edge profile. A bevel or live edge may not provide a flat mounting surface. Place the controller on a flat section where the screws can enter safely and the housing does not rock. Follow the specified setback and orientation in the installation guide when one is given.
Test chair and leg clearance
Lower the desk to the shortest seated height you expect to use. Move the chair fully in, rotate the armrests and cross or reposition the legs as you normally would. The controller must not become the lowest obstruction or press against the thigh. Then pull the chair back and stand to see whether an armrest catches the housing.
The standing desk clearance guide explains how to test the complete occupied workstation. Remember that a thick top, drawer and controller all reduce the vertical space beneath the surface.
Keep it clear of other accessories
A controller needs room for the hand and its cable connector. Do not place a drawer immediately beside it if the drawer face blocks the buttons. Keep clamps, headphone hooks and charging cables from hanging across the controls. Accidental button presses can happen when an object rests against the panel.
Plan future accessories too. A free section under the front edge may later be useful for a drawer or keyboard tray. Marking the full underside layout helps preserve usable zones and prevents screws from colliding.
Plan the controller cable
The cable should reach its specified port without tension, sharp bends or contact with moving parts. Route it along the underside using the approved clips or ties. Keep extra length controlled and away from the lifting columns, joints and pinch points. Do not extend or splice the cable unless the manufacturer explicitly permits it.
Move the desk through its entire height range while watching the cable. Because the controller moves with the top, its local cable run should stay stable, but the connection to the control box still needs a safe path. Coordinate it with the standing desk cable management plan.
Installation sequence
- Assemble the base and top according to the manufacturer instructions.
- Identify approved pre-drilled holes or controller zones.
- Place the chair, keyboard and mouse in their normal positions.
- Hold the controller on the right and left and test seated and standing reach.
- Check the chair arms, thighs, drawers, rails and every underside accessory.
- Confirm that the cable reaches the correct control-box port without tension.
- Mark holes and limit drilling depth for the actual top thickness.
- Install with the supplied or specified fasteners without overtightening.
- Secure the cable, then test every button and the complete height range.
Coordinate the controller with daily use
Once the installation is secure, set a comfortable seated height and standing height instead of treating a displayed number as a universal target. The active Aspire Standing Desk Base and Aspire Custom Solid Wood Standing Desk pages provide current product information. Use the instructions supplied with the exact controller for button operation.
If memory positions are supported, the guide to standing desk memory presets explains how to save useful positions and recheck them when footwear or equipment changes. Memory settings make a well-placed controller more convenient, but they do not replace collision checks.
What to do after moving or replacing the top
A controller that worked on one top may need a different position on another. Thickness, edge shape and pre-drilled holes can change. Confirm screw length again rather than reusing hardware automatically. Inspect the cable and connector before powering the desk.
If the desk does not move normally after installation or loses its height reference, stop and consult the exact manual. The guide on resetting an Aspire standing desk base summarizes the official reset sequence and error-code troubleshooting. Do not repeatedly operate a desk that is colliding, binding or making an unusual sound.
Common placement mistakes
Drilling before sitting at the desk
A position that looks balanced from above may require an awkward reach in real use. Test with the chair and input devices first.
Mounting too close to the corner
A corner can expose the housing to impacts and may not leave enough material around a screw. Follow the approved mounting zone.
Ignoring the chair armrest
The armrest often rises into the controller area as the chair moves. Test all normal chair positions.
Pulling the cable tight
Tension at the connector can cause intermittent operation or damage. Use the intended route and secure slack.
Hiding the display too far under the top
Protection is useful only if the panel remains readable and reachable. Find a balanced setback.
Final recommendation
Install the controller under the front edge on the side that combines easy reach with the clearest underside path. Test both hands, the chair, leg space, accessories and cable before making holes. Use pre-drilled positions and manufacturer instructions whenever provided.
After installation, test every button and run the desk slowly from minimum to maximum height while watching for conflicts. A good controller position feels easy in daily use and remains protected throughout the movement of the complete workstation.
Sources: CCOHS, Sit/Stand Desk; Burotic Aspire installation guide and verified product pages linked above.


Previous article
How Thick Should a Standing Desk Top Be?
Next article
Where Should You Put a Drink on Your Desk? A Spill-Safe Setup