

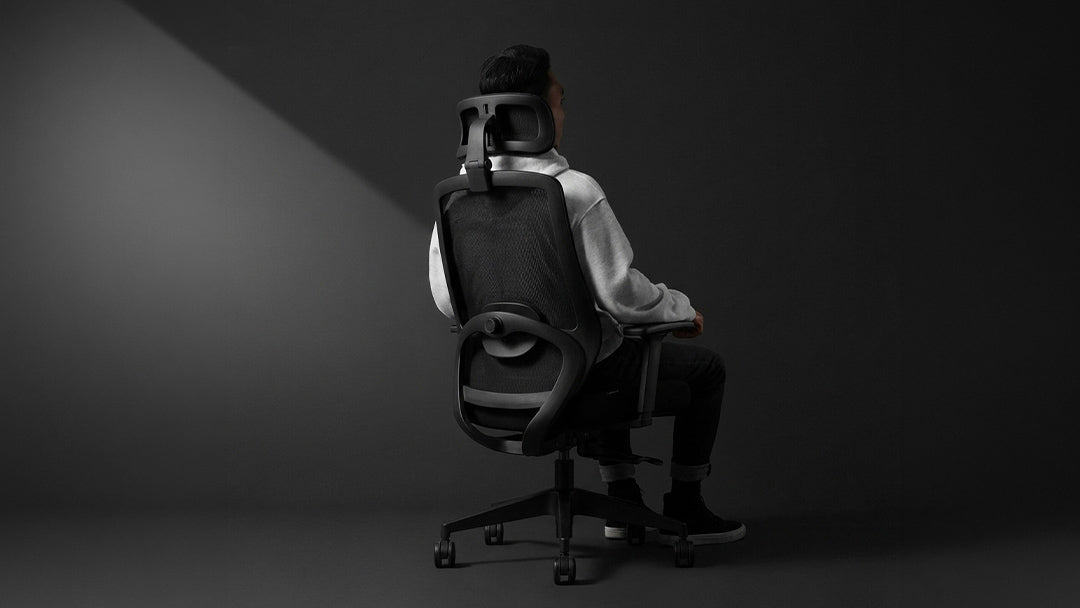
How to Adjust The Loop Ergonomic Chair

In this article
Your Loop ergonomic chair includes multiple adjustments designed to support your body throughout the workday. Properly setting up the chair can improve comfort, encourage a more natural posture, and help reduce pressure on your back, shoulders, and legs.
In this guide, we explain how to adjust the seat height, seat depth, backrest tilt, lumbar support, armrests, and headrest. Each section includes a short demonstration video showing exactly how the adjustment works.
Before you begin
Sit all the way back in the chair and keep both feet flat on the floor. Make each adjustment gradually until your body feels supported without uncomfortable pressure.
For the best results, adjust your chair in this order:
- Seat height
- Seat depth
- Lumbar support
- Armrests
- Backrest tilt
- Headrest
Never force a control or adjustment. If something does not move easily, return it to its original position and watch the corresponding video before trying again.
1. Adjust the seat height
Use the height-adjustment lever located underneath the seat. To raise the chair, remove your weight from the seat and activate the lever. To lower the chair, remain seated while activating the same lever.
Your seat is at the correct height when:
- Both feet rest flat on the floor;
- Your knees form a comfortable angle of approximately 90 degrees;
- Your thighs are approximately parallel to the floor;
- You can use your desk without raising your shoulders.
If your desk is too high to maintain this position, consider using a footrest rather than raising the chair until your feet no longer touch the floor.
2. Adjust the seat depth
The seat-depth adjustment allows you to move the seat forward or backward based on the length of your legs.
Activate and hold the adjustment rod located underneath the seat while sliding the seat forward or backward. Once you reach the desired position, release the control to lock the seat in place.
There should be approximately two to three fingers of space between the front edge of the seat and the back of your knees. This allows you to sit against the backrest without creating pressure behind your legs.
3. Adjust the backrest tilt
The backrest tilt allows you to sit upright or lean back more comfortably. Use the control shown in the video to release the backrest. Lean backward until you reach a comfortable angle, then use the control again if you would like to lock the backrest in position.
A more upright position is generally preferable for focused computer work. A slight recline can be more comfortable when reading, speaking on the phone, or taking a short break.
Changing positions throughout the day is better than remaining in one fixed posture for several hours.
4. Position the lumbar support
The lumbar support should follow the natural curve of your lower back. Adjust its position using the movement shown in the video until it rests comfortably in the curve of your lower back. It should not be positioned in the middle of your back or directly against your pelvis.
The correct position should provide noticeable support without creating a strong pressure point or pushing your entire body forward. Small adjustments can make a significant difference, so take a moment to test a few positions.
5. Adjust the armrest height
Press the adjustment button and raise or lower each armrest. Release the button once you reach the desired height.
Your elbows should form an angle of approximately 90 degrees while your shoulders remain relaxed. If the armrests push your shoulders upward, lower them slightly. If your arms receive little or no support, raise the armrests until your forearms can rest naturally while keeping your elbows close to your body.
6. Adjust the armrest position
The armrest pads can also be repositioned to better support your forearms while you work. Gently slide or rotate the pads using the movements demonstrated in the video.
Position them so you can comfortably reach your keyboard and mouse without extending your arms forward or moving your elbows away from your body. The left and right armrests can be adjusted independently.
7. Adjust the headrest
Adjust the height and angle of the headrest so it comfortably supports the base of your head or the upper part of your neck when you recline.
The headrest should not push your head forward while you are sitting upright. It is primarily intended to provide support while you are leaning back, so it is normal for your head to have less contact with it during focused computer work.
Test the headrest in both an upright and slightly reclined position to find the most comfortable setting.
Check your final sitting position
Once all the adjustments have been completed, verify the following:
- Your feet are flat on the floor or supported by a footrest;
- Your knees are positioned at a comfortable angle;
- There are two to three fingers of space behind your knees;
- Your lower back is supported;
- Your shoulders remain relaxed;
- Your elbows stay close to your body;
- Your head remains in a natural, upright position;
- You can reach your keyboard and mouse without leaning forward.
Even an excellent sitting position can become uncomfortable when maintained for too long. Change positions regularly, use the chair's recline function, and stand up periodically throughout the day.
Frequently asked questions
The rod underneath the seat moves, but nothing happens. Is this normal?
Yes. The rod releases the seat-depth mechanism, but it does not move the seat by itself. Hold the control in the activated position while manually sliding the seat forward or backward. Release it once the seat reaches the desired position.
Why won't the chair move upward?
Remove your weight from the seat before activating the height-adjustment lever. The pneumatic cylinder cannot raise the chair properly while your full weight remains on it. To lower the chair, remain seated while activating the same control.
Should I keep the same sitting position all day?
No. Your chair is designed to encourage movement and allow you to alternate between different positions. Slightly change the backrest angle, adjust your posture, and take regular standing breaks throughout the day.
What should I do if an adjustment will not move?
Do not force the mechanism. Watch the corresponding video again and make sure you are activating the correct control while moving the adjustable component. Some controls must be held in position during the adjustment.
Need additional help?
If you are still having difficulty with an adjustment after watching the corresponding video, please contact the Burotic team. Include your order number and, if possible, a short video showing the control or adjustment that is causing the problem. This will help our team identify the issue and assist you more quickly.

Previous article
Vertical Monitor Setup Guide: When Portrait Mode Works Best
Next article
Large Standing Desk Buying Guide for Canadian Workspaces