

Where to Put a Desk in a Bedroom or Small Home Office

In this article
The best place for a desk is not always the only empty wall. In a bedroom or small home office, desk placement affects glare, video-call privacy, chair movement, cable routing and how easily work can be put away. A good layout gives the user a workable view, a clear path and enough depth for the equipment actually used.
This guide offers a practical sequence for choosing a desk location before you buy or move furniture. Start with the room, then the task, then the desk. That order prevents a visually attractive layout from becoming difficult to use.
Map the room before choosing a wall
Measure the room and draw a simple plan. Include doors and their swing, windows, baseboard heaters, radiators, closets, vents, outlets and fixed furniture. Mark the width and depth of the proposed desk, then add the chair footprint and the space required to sit down and stand up.
Do not treat the chair as if it disappears under the desk. A rolling chair projects behind the work surface during use, and a reclining backrest needs more room. Also check whether drawers, closet doors and bed storage can open when someone is seated.
Record the real desk depth
The quoted desktop depth is only the beginning. Monitor arms can extend behind the rear edge, cables need bend room, and a wall-mounted shelf may project into the same zone. If the desk has a drawer, frame rail or cable tray, inspect the space below before deciding where the chair and legs will go.
For help matching equipment to surface depth, consult Burotic's guide to 24- and 30-inch desks. A shallow desk can work for a laptop or mounted screen, while larger displays and paper-based work may benefit from more depth.
Choose a relationship to the window
Perpendicular to the window is a strong starting point
Placing the desk so the window is to one side often reduces direct glare on the screen while preserving daylight. It can also provide a more even face light for video calls than sitting with the window directly behind you. Try both side orientations because the sun path, nearby buildings and window coverings change the result.
Monitor the space at the times you normally work. A location that is comfortable at 9 a.m. may produce strong reflections late in the afternoon. Adjustable blinds or curtains help, but furniture placement should do as much of the work as possible.
Facing the window can work with glare control
A window view may feel open and give the eyes a distant point to look toward. However, a bright scene directly behind the monitor can make the screen harder to read. Leave space between the screen and window, control direct sun and avoid blocking required access to the window or heating equipment.
If you are considering this arrangement, read our detailed guide to putting a desk in front of a window. The right answer depends on orientation, glare, privacy and the room's mechanical features.
A window behind the user needs extra care
Light from behind can reflect on the monitor and can make the user appear dark on camera. It may also expose the screen to people outside, depending on the floor and sightline. Window coverings and screen angle can help, but test with the actual display turned on.
CCOHS identifies glare, screen placement and lighting as parts of office ergonomics. The goal is not a universally perfect compass direction. It is a readable screen, a relaxed working position and lighting that can adapt through the day.
Bedroom desk placement: protect both work and rest
Create visual separation from the bed
When possible, place the desk so the bed is not the main view during work and the screen is not the first thing seen from the pillow. A perpendicular wall, open shelf or curtain can create a boundary without making the room feel smaller. Even a small change in orientation can distinguish the work zone.
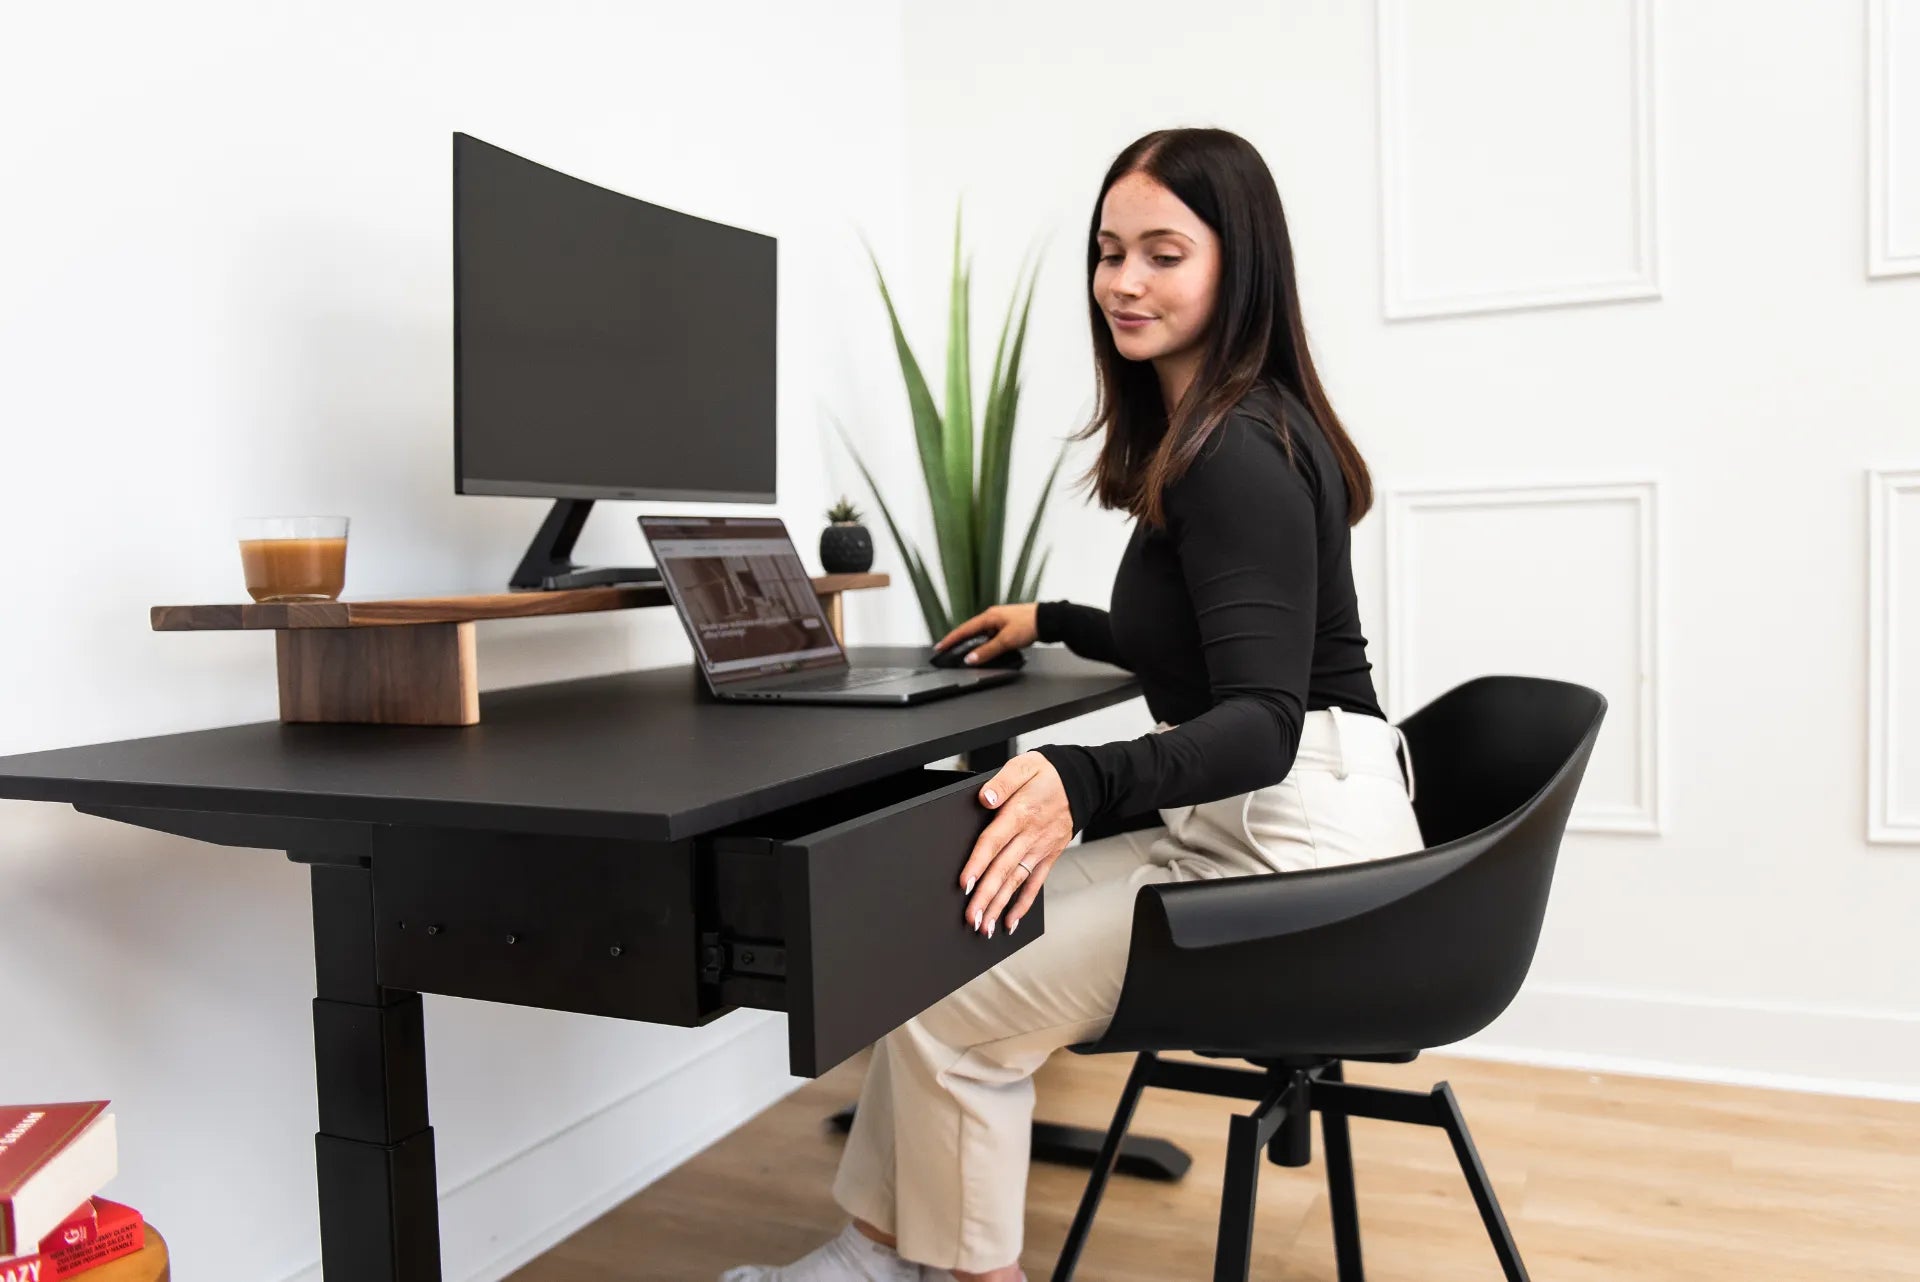
If the desk must sit beside the bed, keep the surface disciplined. Use a tray or drawer for work items, route cables out of sight and close the laptop at the end of the day. The photo for this article shows a compact black desk with a built-in drawer, a raised monitor and a contained work surface. Those visible features help show how storage and vertical organization can reduce spillover.
Do not block daily bedroom functions
Maintain access to both sides of the bed where needed, the closet, dresser drawers and exits. Avoid creating a cable across a walking route. If a chair must move into the passage while in use, confirm that another person can still leave the room safely.
Noise matters too. If another person sleeps or changes schedules in the same room, consider keyboard noise, task lighting and video-call timing. A desk location near the door may simplify leaving quietly, while a location farther from the bed may improve separation. The household routine should decide.
Consider the camera view
Open your meeting application and inspect the real camera frame before committing. Check for mirrors, private items, strong backlight and movement through a doorway. A plain wall or controlled shelf behind the user can be easier than relying on a virtual background every day.
Small dedicated office: prioritize circulation and task zones
In a room used only as an office, the temptation is to push the desk against the longest wall. That can be efficient, but first decide whether the job needs a primary computer zone, paper area, storage, printer access or a second seat.
A straight desk along a wall leaves the centre open and usually simplifies cables. A desk facing into the room can create a professional camera background and a sense of separation, but it requires floor outlets or careful cable routing. It also consumes more circulation space because the chair and desk occupy the centre together.
A corner can support multiple zones. Burotic's guide to planning an L-shaped standing-desk layout explains how to measure return depth, chair movement and nearby storage. If the room and tasks suit that shape, the L-Shaped Aspire Solid Wood Standing Desk is one current Burotic configuration to assess against your measurements and material preferences.
Plan ergonomic relationships after choosing the zone
Set the desk and chair together
The Government of Canada's ergonomics guidance emphasizes the relationship among chair height, foot support and the work surface. In a fixed-height setup, the chair may need to rise to meet the keyboard, with a footrest added if the feet no longer reach the floor. An adjustable-height desk can meet the user more directly, but it still needs clearance at every planned height.
Check the lowest and highest positions with shelves, windowsills and wall art. Confirm that cables do not pull and that a monitor arm does not strike the wall. Test the chair at working and reclined positions.
Keep the screen aligned with the main task
Place the primary screen in front of the user rather than in front of the desk's geometric centre if the keyboard is offset. Avoid layouts that require repeated twisting toward a screen placed around a corner. If a window influences the screen angle, preserve both glare control and a neutral working direction.
Make task lighting adjustable
Use ambient light plus a task light that can illuminate documents without shining into the eyes or reflecting in the screen. Position the lamp according to the user's writing hand when practical, and make sure it does not block the monitor or camera.
Power, data and cable routing
List every powered item, including the desk, monitor, computer, lamp, speakers, charger and accessories. Locate outlets before placing the desk. Extension cords should not become permanent trip lines, and overloaded adapters are not a layout strategy. Follow product instructions and local electrical requirements.
If the desk changes height, route a controlled cable bundle with enough slack for the full travel. Move the desk slowly through the range while observing connections. Keep power bricks off the floor where they can be kicked or caught by chair casters, but preserve ventilation and access.
Four layouts to test with tape
1. Desk on a side wall, perpendicular to the window
This is a versatile starting point for daylight and glare control. It often keeps the camera away from the brightest background and leaves the window accessible.
2. Desk centred on a solid wall
This simplifies cable routing and can create a calm visual background. Confirm that the user is not facing a high-traffic doorway if interruptions are distracting.
3. Desk in a corner
A corner can preserve floor space and support storage, but it may limit monitor-arm movement and create a dark zone. Measure both walls, baseboards and any return.
4. Desk facing into the room
This creates separation and a controlled backdrop but requires careful cable management and more circulation space. Mock up the desktop and chair with painter's tape before moving heavy furniture.
Common placement mistakes
- Measuring only the desktop: include the chair, recline, monitor hardware and cable clearance.
- Ignoring light at different hours: test the room during your normal schedule.
- Blocking heat or ventilation: keep required clearances around heaters, radiators and vents.
- Placing outlets behind inaccessible furniture: plan safe access before the desk is loaded.
- Choosing the camera background last: privacy and backlight can force a complete rearrangement.
- Letting the work zone take over a bedroom: use storage and an end-of-day reset to restore the room.
A 15-minute placement test
Mark the desk and chair footprint with tape. Sit on a temporary chair in the proposed position. Look toward the screen location, open doors and drawers, walk every path, and inspect the camera view. Check outlet reach without stretching cables across a route. Repeat at the time of day when glare is most likely.
The best desk location is the one that supports the work while respecting the rest of the room. A bedroom benefits from clear boundaries; a compact office benefits from deliberate task zones. In both cases, measurement, light and circulation matter more than a single design rule.
Sources consulted: Canadian Centre for Occupational Health and Safety, Office Ergonomics, Positioning the Monitor and Eye Discomfort in the Office, reviewed August 27, 2026; Government of Canada, The Fundamentals of Ergonomics and Guide to Address Ergonomics-Related Hazards, reviewed August 27, 2026. Canadian competitor coverage from EffyDesk was reviewed on August 27, 2026 for current questions about bedroom offices, small spaces and chair clearance.
Previous article
How to Fit Two Monitors on a Small Desk
Next article
Minimalist Desk Setup Guide for Focused Work