

Can You Mount a Laptop on a Monitor Arm? Compatibility and Setup Guide

In this article
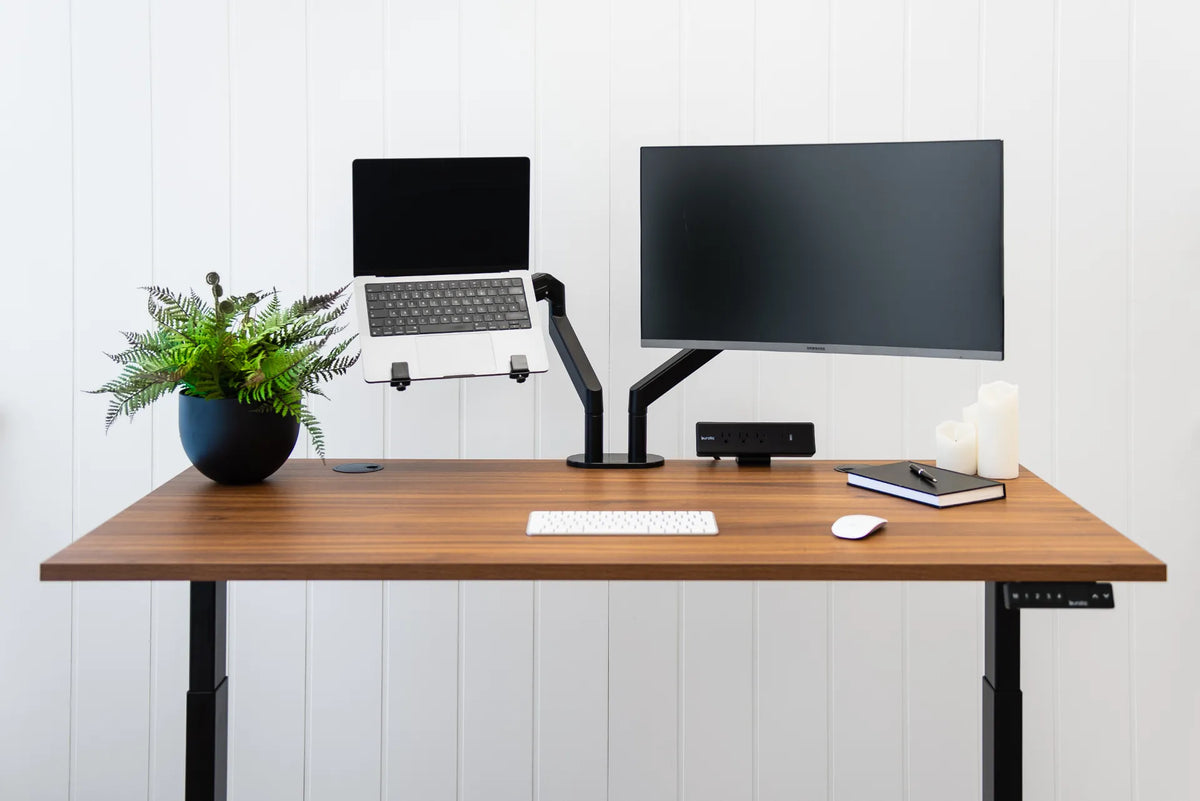
Yes, you can mount a laptop on a monitor arm, but the laptop normally sits on a purpose-built tray rather than attaching directly to the arm. A safe setup depends on four things: the tray must hold the computer securely, the arm must support the combined weight, the desk clamp or grommet must suit the desktop, and the laptop must retain enough airflow.
This arrangement can free valuable desk space and bring a laptop screen closer to the height of a separate monitor. It is especially useful when the laptop acts as a second display. It is not automatically ergonomic, however. Raising the computer also raises its built-in keyboard, so most people need an external keyboard and mouse for sustained work.
How a laptop attaches to a monitor arm
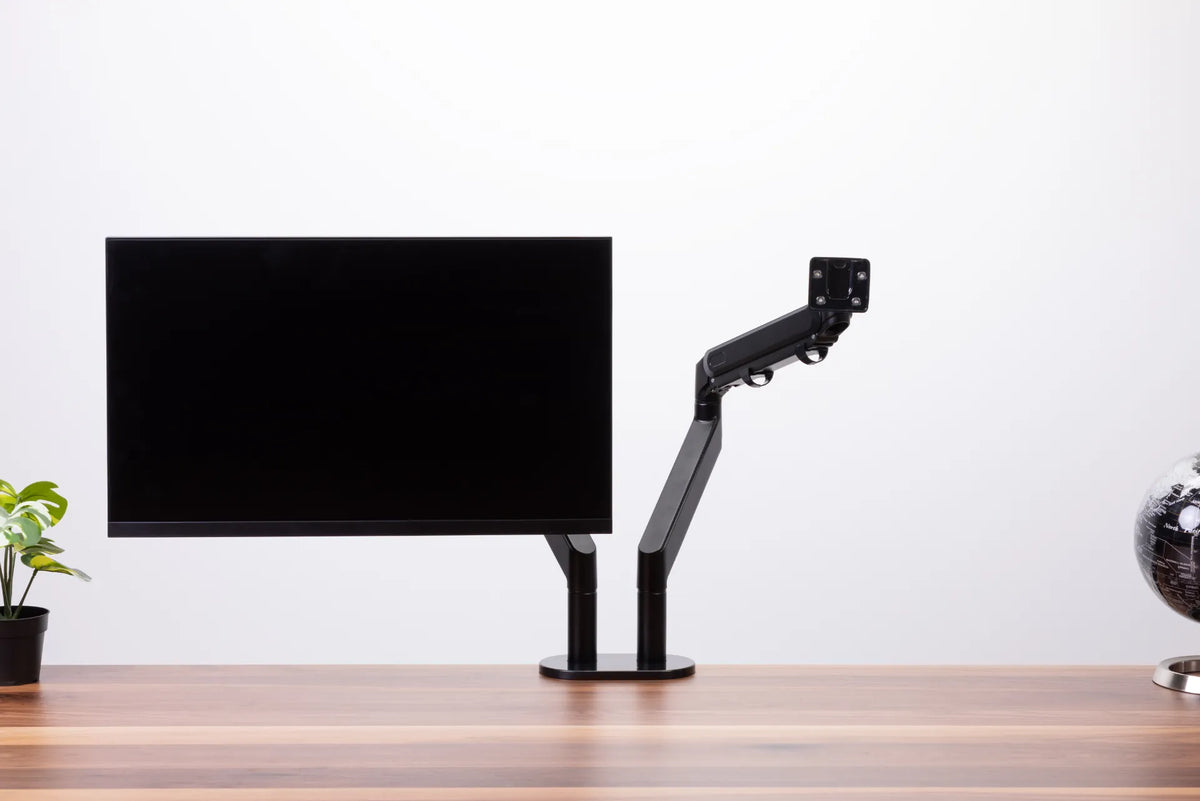
Most monitor arms end in a VESA mounting plate designed for a display. A laptop has no VESA holes, so a laptop tray acts as the adapter. The tray connects to the plate and supports the computer from below. Raised lips, adjustable side stops or straps help keep the laptop in place. The exact retention method varies, which is why the tray instructions matter.
Some arms are sold with an optional laptop holder. Others accept a separate VESA-compatible tray. Confirm the VESA pattern on the tray and arm before ordering. A physical fit between the plate and tray does not prove that the arm can safely carry the load.
Five compatibility checks before you buy
1. Add the laptop and tray weights
The arm carries both pieces. Add the laptop weight to the tray weight, then compare that total with the arm's stated capacity. Stay within the manufacturer's range. An arm that is overloaded may sag, drift or become difficult to position. An arm designed for a heavier display may also be hard to balance with a very light laptop and tray.
Use the specifications for the exact arm segment that will hold the laptop. On a dual arm, the limit may apply to each arm rather than to the pair. Do not estimate by appearance.
2. Check the tray dimensions and retention points
Measure the laptop's width and depth, not only its advertised screen size. Make sure its feet rest on the tray and that the front lip does not press against a port, speaker or trackpad. Side stops should not squeeze the chassis or block connectors. If the setup will move frequently, choose a retention system intended for that movement.
A thick protective case can change the fit. So can a laptop with a wedge-shaped base. Verify the usable tray dimensions and adjustment range rather than assuming that every 14-inch or 16-inch model has the same footprint.
3. Confirm the VESA interface
The tray and arm need matching VESA interfaces or an approved adapter. The screw length also matters: screws that are too short may not engage properly, while screws that are too long can damage a component. Use the supplied hardware and follow the installation sequence in the product manual.
4. Verify the desk mount
A clamp mount needs a solid, flat area at the rear or side of the desk. Measure desktop thickness and look below for frame rails, cable trays, drawers or bevelled edges that could interfere. A grommet mount needs a suitable opening and enough clear space underneath for its plate and fastener.
Do not clamp an arm to glass or to a weak hollow surface unless the desk and arm manufacturers explicitly permit it. A reinforcement plate can distribute pressure, but it does not make an unsuitable desktop safe.
5. Protect ventilation and cable travel
The tray should not block intake or exhaust vents. Leave space around the computer and avoid soft pads that cover openings. Route power and data cables with a gentle service loop so the arm can move without pulling on ports. Test the full motion slowly before regular use.
How to position a laptop beside a monitor
If the larger monitor is your main screen, centre it in front of you and place the laptop close beside it. Angle the secondary screen inward so you can glance at it without repeatedly twisting your neck. Keep the two screens at a similar viewing distance when practical. Matching the top edges can work well, but the correct height depends on screen size, text scale and how you use each display.
The Canadian Centre for Occupational Health and Safety recommends placing the monitor directly in front of the user when it is the primary screen, with the top of the screen at or slightly below eye level for many users. It also recommends a viewing distance that allows comfortable reading without leaning forward. Treat those points as a starting position and adjust for your vision, prescription lenses and task.
When the laptop is the primary screen, bring it closer to the centre and move the external monitor slightly aside. If both displays are used equally, centre the gap between them. The goal is to reduce repeated head rotation, not to make the setup perfectly symmetrical.
Why an external keyboard and mouse usually matter
A laptop combines the screen and keyboard at a fixed distance. Raising the screen to a comfortable viewing height puts the built-in keyboard too high and too far away for most people. An external keyboard and pointing device let the shoulders relax, keep the elbows near the body and allow the forearms to remain roughly parallel with the floor.
Place the keyboard close enough that you do not reach forward. Keep the mouse beside it, not beyond the laptop or monitor base. If the desk is height adjustable, set its working height after arranging the input devices. Our guide to using an external keyboard and mouse with a laptop explains the trade-offs in more detail.
Step-by-step installation checklist
- Record the laptop weight and dimensions, including any case.
- Confirm the tray size, VESA interface and retention method.
- Add the tray and laptop weights and compare the total with the arm rating.
- Inspect the desktop above and below the intended mounting point.
- Install the clamp or grommet hardware according to the manual.
- Attach the tray with the supplied fasteners before placing the laptop.
- Set the arm tension gradually so the tray stays at the chosen height.
- Secure the laptop without covering vents or pressing on ports.
- Connect cables with enough slack for the full range of motion.
- Test every movement slowly, then position the screens and input devices.
If the arm drops after adjustment, stop using it until you confirm the load, tension procedure and fasteners. If the clamp shifts, remove the laptop before correcting the mount.
Common mistakes to avoid
The most common mistake is buying by screen size alone. Laptop footprint, weight, vent location and port placement are equally important. Another is mounting the laptop high but continuing to type on it for hours. That usually trades neck flexion for raised shoulders and extended wrists.
A third mistake is stretching cables tightly. A moving arm can pull a charger or display cable from the computer and place stress on the connector. Finally, avoid turning a tray into general storage. Extra devices, notebooks and adapters add weight and may slide when the arm moves.
Is a laptop arm right for your desk?
A laptop tray on an arm is a strong option when you use a laptop as a second display, want to reclaim work surface or frequently switch between seated and standing positions. A fixed laptop stand can be simpler when the computer rarely moves. A docking station can complement either approach by reducing the number of cables handled each day.
Before choosing hardware, review our monitor arm compatibility checklist and ergonomic laptop and monitor setup guide. Burotic's monitor arm options include configurations for different workstation needs. Confirm the current product specifications and the compatibility of your exact laptop before purchase.
Conclusion
You can mount a laptop on a monitor arm safely when a compatible tray, appropriate load capacity, suitable desk mount and clear ventilation all line up. Treat the tray as a structural part of the system, not as a universal shelf. Then finish the setup with a separate keyboard and mouse and position the screens according to how often you use each one.

Previous article
How to Install a Clamp-On Power Bar Without Damaging Your Desk
Next article
How Much Space Do You Need Behind a Desk for a Chair?